
Safety & Quality Improvement
RO-ILS Program: Incident Learning for Increased Patient Safety
Radformation is a proud supporter of the RO-ILS program and incident learning.
Not sure where the product manual lives? Need to anonymize your patient data? This FAQ addresses common questions we see on Radformation-related topics.
Q: How do I create an account on the Radformation website?
A: To create an account:
Q: Am I taking/using a license if I log into the System Administration application?
A: No, logging in to the System Administration application will not take up a license.
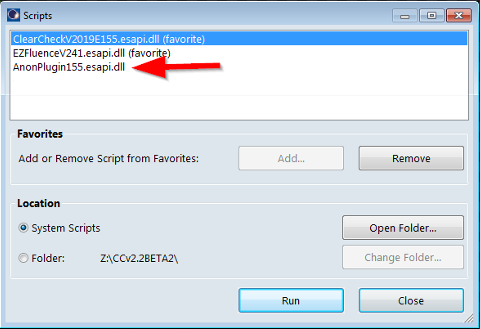
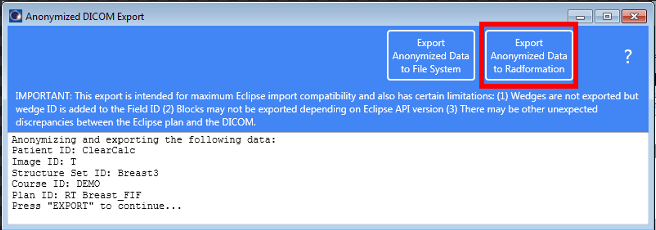
Q: How do I send anonymized data to Radformation?
A: The best method of anonymizing your data varies depending on the product.
For ClearCalc and non-Eclipse TPS systems, the Anonymizer Standalone provides a great way to send data to Radformation for troubleshooting.


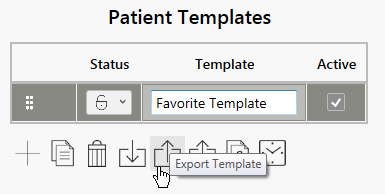
Q: I’d like to share some of my favorite templates with a coworker. How do I do this?
A: ClearCheck, AutoContour, and QuickCode all operate based on user-customizable templates. These templates are exportable and can be shared across multiple installations of those products. Simply export your favorite templates and email them to a colleague or friend.
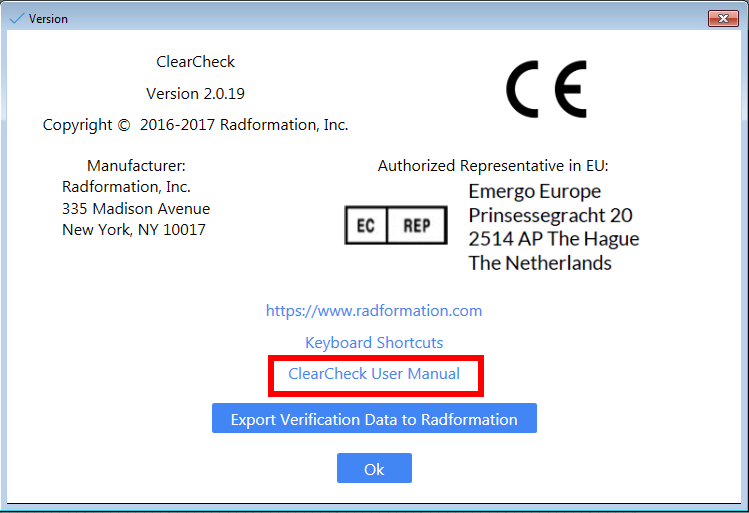
Q: How can I access the user manual for the products?
A: Links to the product user manuals are typically included within the software itself.
Click on the info icon located in the top right corner of the window, and then click on the User Manual link.
Q: What is RegEx, and when can I utilize it?
A: RegEx stands for ‘Regular Expression.’ RegEx allows for extremely powerful text-matching capabilities. There are several applications of this in both ClearCheck and AutoContour.
Here are some examples:
Simple examples:
|
^$ |
Will match “nothing” qualifier. Use this if you want to ensure nothing is entered for a specific field (i.e., “Field Name”). |
|
\s? |
Will match one space or no space. For example, 01\s?CCW will match both 01CCW and 01 CCW. |
|
^G$GantryAngle |
Will match strings that start with a capital G and are followed by the gantry angle of the field. For static fields with gantry angles 0, 180, and 90, this will match G0, G180, G90, etc., but not GG0, G181, 90, or 90G. |
|
PTV* |
String must start with PTV. PTV, PTV50, and PTV5000 will match. GTV5000 and CTV5000 will not. |
|
^PTV\d{2}$ |
The “\d{2}” means that exactly two digits should follow directly after “PTV” in the string you are evaluating. Will match PTV54, PTV70, but not PTV5400, PTV, PTV_54, ptv54, or opt_PTV54. |
More Complex examples:
|
(?i)(L|LT|Left)[^a-zA-Z]*Coch(lea)? |
Will match as above, including cases that use Coch instead of Cochlea. Will match L_Cochlea, L-Coch, LeftCoch, and LCOCHLEA. |
|
(?i)^(L|LT|Left)[^a-zA-Z]*Coch(lea)?$ |
Will match as above but will not match if there are any characters before or after the tested string. Will match L_Cochlea, LtCochlea, LeftCoch but NOT zzL_Cochlea, opt_LtCochlea, LeftCoch_PRV, etc. |
|
(?i)^PTV[_\s]?(\d{2}|\d{4})$ |
(?i) makes the RegEx case insensitive; [_\s]? matches either an underscore, a whitespace, or nothing; (\d{2}|\d{4}) matches exactly 2 digits OR 4 digits. Strings that will match are PTV54, PTV70, PTV5400, ptv54, PTV_54, and PTV 54. Strings that will NOT match are PTV, opt_PTV54, and PTV70.20. |
|
(^G$GantryAngle$|^$ArcDirection) |
Will match strings as above OR match strings that start with the direction of the arc if the field is not static (i.e., CCW or CW). |
Here is a link to a guide to setting up common strings in ClearCheck or AutoContour:
RegEx common strings
Here is an online tool to test your regular expressions before implementing them clinically:
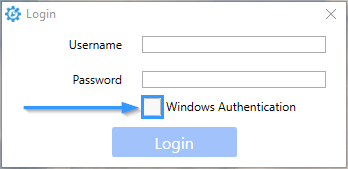
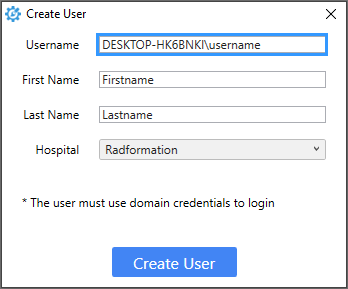
Q: How do I set up Windows Authentication to use my Windows login and password to log into the ClearCalc or AutoContour standalone applications?
A: To simplify the login process for Radformation’s suite of tools and comply with many IS&T security requirements, the following products allow for the setup and use of Windows Authentication.


Q: What does API stand for, and how does it work?
A: API stands for Application Programming Interface. Specifically for Eclipse, it is called ESAPI, or Eclipse Scripting Application Programming Interface. APIs give users access ‘under the hood’ in order to customize the program (ex., ARIA/Eclipse) to their needs. Users can pull information and analyze it (and with Eclipse v15.5+, write changes back), allowing users to streamline planning and plan reporting even more.
ClearCheck also has its own API. The ClearCheck API class allows other C# applications to call ClearCheck functionality in their standalone programs instead of using ClearCheck as an Eclipse plugin. Below is a link with more information about utilizing the ClearCheck API.
Q: What are Document Services and how can I use them?
A: Many of our Radformation Products leverage the ARIA® Oncology Services package to view or automatically upload PDF documents into ARIA on behalf of the user. Reach out to our support team if you need assistance in getting this set up.
Products that allow document viewing:
Products that allow for uploading to ARIA®:
We selected the topics addressed above because they see the most action on the support line. Hopefully, that clears a few things up!
If you have another burning question for us, don't hesitate to reach out by dropping a comment below.
Our Contributors

Kalin Shipman is a certified medical dosimetrist with over ten years of clinical experience in dosimetry and radiation therapy. Currently, she serves as the Senior Clinical Success Manager for the Mid-Atlantic Region. She is passionate about supporting and educating her fellow dosimetrists and moving the dosimetry profession forward while keeping clinical excellence and safety as her top priorities. In her spare time, she enjoys working on her abysmal golf game and "The Office" reruns.
Gayle Harnisch is a Knowledge Support Physicist at Radformation. When she's not creating educational videos or knowledge articles, she enjoys live blues and jazz music, a glass of wine at a local winery, and golfing with her husband. In fact, Gayle and her husband have golfed over 240 different courses together, and they're still happily married!

Leave a comment